Just because you have an inexpensive piece of aluminum that you choose to fish from doesn't mean you have to skimp when it comes to electronics. One of the biggest mistakes most anglers make is not utilizing their depthfinders as much as they should or to their full capacity. That especially applies here in Indiana. Part of that utilization for an aluminum boat owner is proper installation of the transducer for the best possible readings.
Unlike our fiberglass brethren that can install inside the hull for protection while shooting through the glass, aluminum boat anglers pretty much have little choice but to mount externally. Here then the key becomes proper placement and location. The ideal situation for most of these setups is using a fiberglass or composite transducer mounting plate like in the picture. These can be obtained at many of the larger marine center outlets. The advantage is one of less drilling but increased flexibility.
Installation of the board first to the hull using just 2 screws and a very generous amount of silicone between the board and the hull is the first step. Once in place, you are then free to move the transducer around as needed, higher or lower, left or right until you find the optimal location for reading at speed. This is usually the spot with the least amount of water disturbance coming from beneath the hull. Since the shorter transducer screws only penetrate into the composite board and not the hull, drilling and redrilling without need to refill and plug holes becomes the norm.
The other option, and the one I chose by default because the mounting boards were out of stock once I was ready to install my transducer - and I have little patience :) is to directly mount to the aluminum hull. Here the issue becomes one of "getting it right" the first time, lest you end up putting multiple holes into your boat that will all have to be sealed to avoid taking on water. The photo above right is my installed transducer from the side. It's hard to make out in the picture and is shown much better in the installation diagrams in your manual, but the transducer puck rides just about halfway below the bottom of the hull. This will allow for possible collisions with stumps or such, but is necessary to ensure a smooth supply of water to the transducer face for proper readings. I actually bumped mine a smidge lower than recommended because readings are more important to me than collision risk.
Here is another shot of my installed transducer from the rear. You'll also see a good section of the hull underneath. Here what you want to pay attention to is placing that transducer where the least amount of disturbance coming from the hull occurs. Things like dents, rivets and "lips", anything that create or allow air pockets to form are all bad from an install point of view. Again, the smoothest possible flow of water over the transducers face is what you are after. Avoid the running guides and other such areas as much as possible, and pay attention to how close to the motor you are also. Anything that creates turbulent water that could reach the trasnducer is a no-no.
Beyond that, a little tinkering with proper height and angle to obtain maximum reading clarity is all that is usually needed. When installed correctly you shold be able to get really nice readings at all speeds, from idle up to wide open. Anything less suggests some type of possible error in the setup.


 A call over to "The Boat Place" and a few minutes of conversation with their sales lady (Jackie) and things were looking really good. A brand new
  The front deck is now installed and complete. It has a 4x4 post centrally located underneath for added support with aluminum L-angle on the sides. The deck was then screwed into the aluminum brackets using the 1/4 x 20 2.5" stainless screws. On the left you can also see the Tackle Rac added to the deck riser. This has 3 slots for pliers. scissors, etc. and another 12 holes for hanging lures and hooks. Just below and also on the left is the Rod Buckle system to secure rods and reels on the deck while moving.
 I also added the front storage lid. Inside I installed a flat floor with carpeting. For this trip I threw in 2 life jackets, a throwable cushion, a fire extinguisher, and a portable GPS and still had extra room. I'll also be adding a drift sock and an anchor inside the storage area. I've never carried either before, but both could come in handy with the way these light jon boats get blown around on breezy days.
 The rest of the mid-section holds the 3-bank MinnKota charger and 2 Interstate Megatron batteries. They (the batteries) are currently wired in parallel for doubling the 12v trolling motor systems run capacity. At present, I could run wide open at 40# of thrust for over 4 hours solid before worrying about running low! As I believe I also mentioned previously, I chose to remove the original green carpeting in thos portion and replace with matching gray marine grade carpeting like used on the rest of the boat.
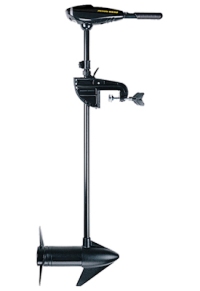
 After a bunch of researching and store shopping (in person and online), I had decided on a MK Endura. But I ran into a little problem, and that was trying to figure out some of the technical aspects of the motor. It is 5 speeds forward instead of 'infinite' speed settings, so what type amp draw, how much thrust per speed setting, etc. was what I wanted to know. MK's site wasn't much help, nor any other site that I came across. That is until I went global and found the Verkauf von Schlauchbooten page out of Berlin.